Replacing the keyboard on Asus UX32VD
After six years of flawless operation, the keyboard on a friend’s Asus Zenbook UX32VD started to miss keypresses. It was easy enough to get a cheap replacement; installing it, not so simple.
A teardown by iFixit gave me an impression that the Asus UX32VD is an easily serviceable machine. That’s mostly true—all of memory, disk, and fans are very accessible, easy to clean up and replace. But the keyboard turned out to be an exception to the rule. Unlike everything else, which is screwed down, the keyboard is held in place by tiny plastic rods that were melted down:

(The big yellow rectangle is a mat visible through the hole left by the touchpad.)
You will have to break a dozen or so of those to get the keyboard out. Most of them are on the perimeter, but there are a few under the black sheet (which is actually keyboard’s backlight).
After you install the replacement, put a drop of an instant glue gel onto each rod, and let it dry. Make sure the keyboard is held down firmly to the chassis; it has low-profile keys, so any dips will be immediately noticeable, and if you fail to secure the keyboard in place, it’ll bounce around when typing.
Also note that a replacement keyboard might have these little things on the back:
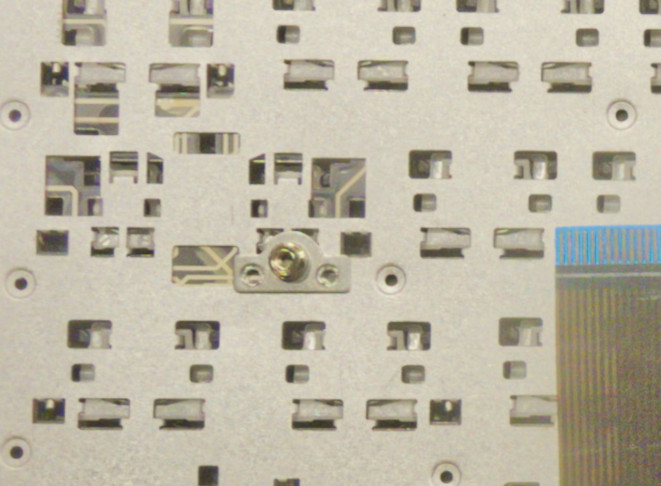
They’re needed for the previous model, UX31, but on UX32VD they’ll bend and short the motherboard. Scrape them off with a screwdriver or something.
Other things to look out for
Transparent plastic covers between motherboard and other components are important. Put them back as they were. I forgot the left one, and the machine didn’t turn on; I’m lucky I didn’t fry anything.
Do not open the ultrabook with rear cover removed. The hinges rely on everything to be assembled to spread the load. If the cover is removed, the stress created by the hinges goes into plastic feet, which are quite brittle. I broke one because I didn’t know that. Gluing it back together with instant glue worked fine though.
Also note that the tiny connectors of the Wi-Fi antennas are prone to catch on stuff, and it’s easy to tear them off. Again, I learned this the hard way by breaking one. Connectors can be soldered back—it’s just one wire, nothing fancy—but you’ll need a soldering iron, and it’s delicate work. Be careful.
Your thoughts are welcome by email
(here’s why my blog doesn’t have a comments form)